SSH框架整合
1 导包(43个)
hibernate - 9
hibernate/lib/required:9个
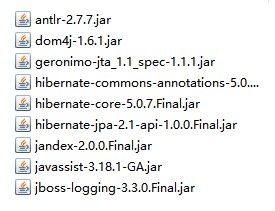
- mysql驱动包 - 1
- c3p0连接池 - 2
hibernate持久化管理的包 - jpa - 1
hibernate-entitymanager-5.0.7.Final.jar
struts2 - 13-1=12
- blank工程 - 13 重复一个
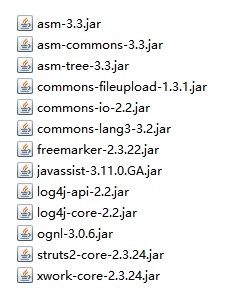
Struts2和Spring整合的包 - 插件包 - 1
struts2-spring-plugin-2.3.24.jar
spring - 13
基本 - 4+2=6
- core、bean、context、expression/log4j、commons-logging
junit - 1
- test
aop - 4
- aop、aspect、aopalliance、weaver
tx - 2
- tx、jdbc
spring和hibernate整合包 - 1
- orm
spring对web工程的支持 - 1
- web
jsp、jspl标签 - 2
- jstl
- standard
2 单独配置Spring容器
2.1 创建配置文件,并导入约束(4个)
导入的约束
- beans
- context
- aop
- tx
<?xml version="1.0" encoding="UTF-8"?>
<beans xmlns:xsi="http://www.w3.org/2001/XMLSchema-instance"
    xmlns="http://www.springframework.org/schema/beans"
    xmlns:context="http://www.springframework.org/schema/context"
    xmlns:aop="http://www.springframework.org/schema/aop"
    xmlns:tx="http://www.springframework.org/schema/tx"
    xsi:schemaLocation="http://www.springframework.org/schema/beans http://www.springframework.org/schema/beans/spring-beans-4.3.xsd
        http://www.springframework.org/schema/context http://www.springframework.org/schema/context/spring-context-4.3.xsd
        http://www.springframework.org/schema/aop http://www.springframework.org/schema/aop/spring-aop-4.3.xsd
        http://www.springframework.org/schema/tx http://www.springframework.org/schema/tx/spring-tx-4.3.xsd">

</beans>
配置spring容器随项目启动而启动:通过<font color="red">监听器</font>开启
  <!-- 配置服务器启动就开启Spring容器 -->
  <listener>
      <listener-class>org.springframework.web.context.ContextLoaderListener</listener-class>
  </listener>
  <!-- 指定spring容器配置文件路径 -->
  <context-param>
      <param-name>contextConfigLocation</param-name>
      <param-value>classpath:applicationContext.xml</param-value>
  </context-param>
3 单独配置struts2
3.1 配置Struts2主配置文件
<?xml version="1.0" encoding="UTF-8"?>
<!DOCTYPE struts PUBLIC "-//Apache Software Foundation//DTD Struts Configuration 2.3//EN" "http://struts.apache.org/dtds/struts-2.3.dtd" >
<struts>
    <constant name="struts.objectFactory" value="spring"></constant>
    <package name="user" namespace="/" extends="struts-default">
        <action name="UserAction_*" class="userAction" method="{1}">
            <result name="success" type="redirect">/index.htm</result>
            <result name="error" >/login.jsp</result>
        </action>
    </package>
</struts>
3.2 配置struts2核心过滤器到web.xml
- <font color="red">位置只能放在最后</font>
  <!-- 配置struts2的核心过滤器 -->
  <filter>
      <filter-name>Struts2</filter-name>
      <filter-class>org.apache.struts2.dispatcher.ng.filter.StrutsPrepareAndExecuteFilter</filter-class>
  </filter>
  <filter-mapping>
      <filter-name>Struts2</filter-name>
      <url-pattern>/*</url-pattern>
  </filter-mapping>
4 Struts2与Spring整合
4.1 导包(整合包)
struts2-spring-plugin-2.3.24.jar
4.2 配置常量
整合包已导入,默认交给spring容器,不需要自己设置了
    <!-- # struts.objectFactory = spring
            将Action对象交给Spring容器管理
     -->
    <!-- struts.objectFactory.spring.autoWire = name
            Spring负责注入Action对象的依赖,根据name自动注入
     -->
4.3 整合方案1
- struts2自己创建action,spring负责组装依赖属性。不推荐
4.4 整合方案2
- spring负责创建action以及组装
applicationContext.xml- spring负责创建
Action对象
<bean name="userAction" class="com.ruki.crm.web.action.UserAction" scope="prototype"> <property name="userService" ref="userService"></property> </bean>- spring负责创建
struts.xmlAction中的class为bean中的name
        <!-- 方式二:推荐使用
            class:spring容器中Action对象的名字 name
         -->
        <action name="UserAction_*" class="userAction" method="{1}">
            <result name="success" >/success.jsp</result>
        </action>
5 单独配置hibernate
5.1 导入实体类&orm元数据
- 实体类以及orm元数据配置文件
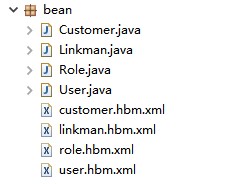
xx.hbm.xml配置文件<?xml version="1.0" encoding="UTF-8"?> <!DOCTYPE hibernate-mapping PUBLIC "-//Hibernate/Hibernate Mapping DTD 3.0//EN" "http://www.hibernate.org/dtd/hibernate-mapping-3.0.dtd"> <!-- 表和实体类的关系 --> <!-- packages:如果添加包,那么其中的所有类型可以写简单类名 --> <hibernate-mapping package="com.ruki.crm.bean"> <!-- name:实体类的类名 table:实体类对应的表名 --> <class name="Customer" table="cst_customer"> <!-- id:主键(不可少),由hibernate维护的表,必须存在主键 name:主键对应的属性名 [column]:主键对应的字段名,当字段和属性一致时,可省略 [type]:类型,字段类型,可以填3中 java类型:java.lang.Long 数据库类型:bigint hibernate类型:long/string/int 不填自动识别 [length]:字段允许的最大长度 不填,类型允许的最大长度 --> <id name="cust_id" column="cust_id"> <!-- generator:主键生成策略 --> <generator class="native"></generator> </id> <!-- property:除了主键意外的其他普通属性/字段 --> <property name="cust_name" column="cust_name"></property> <property name="cust_source" column="cust_source"></property> <property name="cust_industry" column="cust_industry"></property> <property name="cust_level" column="cust_level"></property> <property name="cust_linkman" column="cust_linkman"></property> <property name="cust_phone" column="cust_phone"></property> <property name="cust_mobile" column="cust_mobile"></property> <!-- set 属性 |- name:多的一方的属性名 |- inverse:是否放弃外键维护 默认为false,不放弃 true,放弃维护,只有 1(被引用)的一方,才能放弃 |- cascade:级联操作选项 save-update:保存Customer的时候,自带的Linkman一起保存 delete:级联删除 all:save-update + delete key - column:表示自己被别人引用的外建明 one-to-many - class:多的一方的引用类型 --> <set name="linkmen" inverse="true"> <key column="lkm_cust_id" ></key> <one-to-many class="Linkman"/> </set> </class> </hibernate-mapping>
5.2 配置主配置文件
<?xml version="1.0" encoding="UTF-8"?>
<!DOCTYPE hibernate-configuration PUBLIC "-//Hibernate/Hibernate Configuration DTD 3.0//EN" "http://www.hibernate.org/dtd/hibernate-configuration-3.0.dtd" >
<hibernate-configuration>
  <session-factory>
          <!-- 必填 ,连接数据库的基本信息-->
        <property name=""></property>
        <property name="hibernate.connection.driver_class">com.mysql.jdbc.Driver</property>
        <property name="hibernate.connection.url">jdbc:mysql:///ssh</property>
        <property name="hibernate.connection.username">root</property>
        <property name="hibernate.connection.password">root</property>
        <!-- 数据库方言,形成的sql语句规范 -->
        <property name="hibernate.dialect">org.hibernate.dialect.MySQLDialect</property>

        <!-- 选填 -->
        <!-- 展示sql语句 -->
        <property name="hibernate.show_sql">true</property>
        <!-- 格式化展示的sql语句 -->
        <property name="hibernate.format_sql">true</property>

        <!--
            ## auto schema export
                自动导出表结构
            #hibernate.hbm2ddl.auto create-drop - 先删(如果存在)每次操作都是创建新表,操作完再删除表(测试用)
            #hibernate.hbm2ddl.auto create - 先删(如果存在),每次执行都是创建新表(原表被删除)
            - 以上两种选项,不建议使用
            #hibernate.hbm2ddl.auto update - 如果表不存在,创建表;如果存在,在已有的表中操作;
                                            - 如果表结构改变,同时会更新表结构
            - 建议使用
            #hibernate.hbm2ddl.auto validate - 只在表存在,且表结构正确时可用
         -->
        <property name="hibernate.hbm2ddl.auto">update</property>


        <!-- 设置隔离级别不用了 -->
        <!-- 和当前线程绑定也不用了 -->

        <!-- 设置隔离级别 -->
        <!-- #hibernate.connection.isolation 4 -->
        <!-- <property name="hibernate.connection.isolation">4</property> -->

        <!-- 配置session和当前线程绑定
            "current_session_context_class" thread
         -->
        <!-- <property name="current_session_context_class">thread</property> -->


        <!--  引入映射文件,使用相对路径,加载元数据 customer.hbm.xml
                resource:从类路径开始
         -->
        <mapping resource="com/ruki/crm/bean/customer.hbm.xml"/>
        <mapping resource="com/ruki/crm/bean/linkman.hbm.xml"/>
        <mapping resource="com/ruki/crm/bean/role.hbm.xml"/>
        <mapping resource="com/ruki/crm/bean/user.hbm.xml"/>
  </session-factory>
</hibernate-configuration>
6 spring整合hibernate
6.1 整合原理
- 将
sessionFactory对象交给spring容器管理
6.2 在Spring中配置sessionFactory
6.2.1 方案一:使用外部hibernate.cfg.xml
依旧使用外部
hibernate.cfg.xml文件<!-- 加载配置文件的方式一:使用Hibernate自己的配置文件 --> <property name="configLocation" value="classpath:hibernate.cfg.xml"></property>
6.2.2 方案二:Spring中直接配置hibernate配置
在Spring配置中放置hibernate配置信息
<!-- 方式二:所有的配置直接写在spring容器中,hibernate.cfg.xml文件省略 -->
        <property name="hibernateProperties">
            <props>
                <prop key="hibernate.dialect">org.hibernate.dialect.MySQLDialect</prop>
                <prop key="hibernate.show_sql">true</prop>
                <prop key="hibernate.format_sql">true</prop>
                <prop key="hibernate.hbm2ddl.auto">update</prop>
            </props>
        </property>
6.2.3 引入元数据(别忘) - classpath
name:mappingDirectoryLocationsvalue:classpath:com/zzxx/crm/beans- 有的时候不加
classpath也可以 - 服务器启动失败,就加上
classpath
- 有的时候不加
<property name="mappingDirectoryLocations" value="classpath:com/zzxx/crm/beans"></property>6.2.4 完整配置sessionFactory
    <!-- 管理SessionFactory对象 -->
    <bean name="sessionFactory" class="org.springframework.orm.hibernate5.LocalSessionFactoryBean">
        <!-- 注入dataSource -->
        <property name="dataSource" ref="dataSource"></property>

        <!-- 加载配置文件的
             方式一:使用Hibernate自己的配置文件 -->
        <!-- <property name="configLocation" value="classpath:hibernate.cfg.xml"></property> -->

        <!-- 方式二:所有的配置直接写在spring容器中,hibernate.cfg.xml文件省略 -->
        <property name="hibernateProperties">
            <props>
                <prop key="hibernate.dialect">org.hibernate.dialect.MySQLDialect</prop>
                <prop key="hibernate.show_sql">true</prop>
                <prop key="hibernate.format_sql">true</prop>
                <prop key="hibernate.hbm2ddl.auto">update</prop>
            </props>
        </property>
        <!-- 引入元数据 -->
        <property name="mappingDirectoryLocations" value="classpath:com/zzxx/crm/beans"></property>
    </bean>
7 Spring整合c3p0连接池
7.1 配置db.properties
jdbc.driverClass=com.mysql.jdbc.Driver
jdbc.jdbcUrl=jdbc:mysql:///ssh
jdbc.user=root
jdbc.password=123456
7.2 引入连接池到Spring中
    <!-- 引入db.properties配置文件 -->
    <context:property-placeholder location="classpath:db.properties"/>
    <!-- 管理dataSource对象 -->
    <bean name="dataSource" class="com.mchange.v2.c3p0.ComboPooledDataSource">
        <property name="driverClass" value="${jdbc.driverClass}"></property>
        <property name="jdbcUrl" value="${jdbc.jdbcUrl}"></property>
        <property name="user" value="${jdbc.user}"></property>
        <property name="password" value="${jdbc.password}"></property>
    </bean>
7.3 在SessionFactory中注入连接池
- 见6.2.4完整配置
SessionFactory
<!-- 注入dataSource -->
<property name="dataSource" ref="dataSource"></property>
8 Spring整合hibernate环境操作数据库
8.1 DAO类创建:继承HibernateDaoSupport
public class UserDaoImpl extends HibernateDaoSupport implements UserDao{..}
8.2 hibernate模板的操作
8.2.1 execute
@Override
    public User findUserByCode(String code) {
        // HQL\Criteria\SQL

        // HQL
        User user = getHibernateTemplate().execute(new HibernateCallback<User>() {
            @Override
            public User doInHibernate(Session session) throws HibernateException {
                String hql = "from User where user_code=:code";
                Query query = session.createQuery(hql);
                query.setParameter("code", code);
                return (User) query.uniqueResult();
            }
        });
        return user;
    }
8.2.2 findByCriteria
    @Override
    public User findUserByCode(String code) {
        DetachedCriteria dc = DetachedCriteria.forClass(User.class);
        dc.add(Restrictions.eq("user_code", code));
        // Criteria
        List<User> list = (List<User>) getHibernateTemplate().findByCriteria(dc);
        if (list.size() > 0) {
            return list.get(0);
        }
        return null;
    }
8.3 Spring中配置DAO
- 由于底层DAO是对数据库的操作,增删改查,需要事务管理,因此需要注入
sessionFactory
    <!-- 管理dao对象 -->
    <bean name="userDao" class="com.zzxx.crm.dao.impl.UserDaoImpl">
        <property name="sessionFactory" ref="sessionFactory"></property>
    </bean>
9 Spring的AOP事务
9.1 准备工作:TransactionManager
- 核心事务管理器。
TransactionManager,由于整合了hibernate,因此具体实现类为HibernateTransactionManager 事务管理必须注入
sessionFactory<!-- 事务管理核心通知类 --> <bean name="transactionManager" class="org.springframework.orm.hibernate5.HibernateTransactionManager"> <!-- 依赖注入 --> <property name="sessionFactory" ref="sessionFactory"></property> </bean>
9.2 xml配置aop事务
9.2.1 配置通知
<!-- 配置详细的事务属性 -->
<tx:advice id="tx">
<tx:attributes>
<tx:method name="get*" isolation="REPEATABLE_READ" propagation="REQUIRED" read-only="true"/>
<tx:method name="find*" isolation="REPEATABLE_READ" propagation="REQUIRED" read-only="true"/>
</tx:attributes>
</tx:advice>9.2.2 配置织入
<!-- 织入 -->
<aop:config>
<aop:pointcut expression="execution(* com.zzxx.crm.service.impl.*ServiceImpl.*(..))" id="pc"/>
<aop:advisor advice-ref="tx" pointcut-ref="pc"/>
</aop:config>9.3 注解配置aop事务
9.3.1 开启注解事务
<tx:annotation-driven transaction-manager="transactionManager"></tx:annotation-driven>9.3.2 service类中使用注解
// 对类中所有方法生效
@Transactional(isolation = Isolation.REPEATABLE_READ, propagation = Propagation.REQUIRED, readOnly = true)
public class AccountServiceImpl implements AccountService {
// 对当前方法生效
@Transactional(isolation = Isolation.REPEATABLE_READ, propagation = Propagation.REQUIRED, readOnly = false)
public void transfer(int fromId, int toId, double money) {
//..
}
}10 扩大session范围(OpenSessionInViewFilter)
- 为避免使用懒加载时出现
no-session,需要扩大session的作用范围 在
web.xml中配置监听器<filter> <filter-name>OpenSessionInView</filter-name> <filter-class>org.springframework.orm.hibernate5.support.OpenSessionInViewFilter</filter-class> </filter> <filter-mapping> <filter-name>OpenSessionInView</filter-name> <url-pattern>/*</url-pattern> </filter-mapping>
11 补充编码过滤器(CharacterEncodingFilter)
在
web.xml中配置编码监听器<filter> <filter-name>CharacterEncoding</filter-name> <filter-class>org.springframework.web.filter. <filter> <filter-name>CharacterEncoding</filter-name> <filter-class>org.springframework.web.filter.CharacterEncodingFilter.class</filter-class> </filter> <filter-mapping> <filter-name>CharacterEncoding</filter-name> <url-pattern>/*</url-pattern> </filter-mapping>.class</filter-class> </filter> <filter-mapping> <filter-name>CharacterEncoding</filter-name> <url-pattern>/*</url-pattern> </filter-mapping>
12 完整配置文件
12.1 applicationContext.xml
<?xml version="1.0" encoding="UTF-8"?>
<beans xmlns:xsi="http://www.w3.org/2001/XMLSchema-instance"
xmlns="http://www.springframework.org/schema/beans"
xmlns:context="http://www.springframework.org/schema/context"
xmlns:aop="http://www.springframework.org/schema/aop"
xmlns:tx="http://www.springframework.org/schema/tx"
xsi:schemaLocation="http://www.springframework.org/schema/beans http://www.springframework.org/schema/beans/spring-beans-4.3.xsd
http://www.springframework.org/schema/context http://www.springframework.org/schema/context/spring-context-4.3.xsd
http://www.springframework.org/schema/aop http://www.springframework.org/schema/aop/spring-aop-4.3.xsd
http://www.springframework.org/schema/tx http://www.springframework.org/schema/tx/spring-tx-4.3.xsd">
<!-- 管理SessionFactory对象 -->
<bean name="sessionFactory" class="org.springframework.orm.hibernate5.LocalSessionFactoryBean">
<!-- 注入dataSource -->
<property name="dataSource" ref="dataSource"></property>
<!-- 加载配置文件的方式一:使用Hibernate自己的配置文件 -->
<!-- <property name="configLocation" value="classpath:hibernate.cfg.xml"></property> -->
<!-- 方式二:所有的配置直接写在spring容器中,hibernate.cfg.xml文件省略 -->
<property name="hibernateProperties">
<props>
<prop key="hibernate.dialect">org.hibernate.dialect.MySQLDialect</prop>
<prop key="hibernate.show_sql">true</prop>
<prop key="hibernate.format_sql">true</prop>
<prop key="hibernate.hbm2ddl.auto">update</prop>
</props>
</property>
<!-- 引入元数据 -->
<property name="mappingDirectoryLocations" value="classpath:com/zzxx/crm/beans"></property>
</bean>
<!-- 引入db.properties配置文件 -->
<context:property-placeholder location="classpath:db.properties"/>
<!-- 管理dataSource对象 -->
<bean name="dataSource" class="com.mchange.v2.c3p0.ComboPooledDataSource">
<property name="driverClass" value="${jdbc.driverClass}"></property>
<property name="jdbcUrl" value="${jdbc.jdbcUrl}"></property>
<property name="user" value="${jdbc.user}"></property>
<property name="password" value="${jdbc.password}"></property>
</bean>
<!-- 管理Action对象,action一定要配置为多例 -->
<bean name="userAction" class="com.zzxx.crm.web.action.UserAction" scope="prototype">
<property name="userService" ref="userService"></property>
</bean>
<!-- 管理service对象 -->
<bean name="userService" class="com.zzxx.crm.service.impl.UserServiceImpl">
<property name="userDao" ref="userDao"></property>
</bean>
<!-- 管理dao对象 -->
<bean name="userDao" class="com.zzxx.crm.dao.impl.UserDaoImpl">
<property name="sessionFactory" ref="sessionFactory"></property>
</bean>
    <!-- 事务管理核心通知类 -->
    <bean name="transactionManager" class="org.springframework.orm.hibernate5.HibernateTransactionManager">
        <!-- 依赖注入 -->
        <property name="sessionFactory" ref="sessionFactory"></property>
    </bean>
    <!-- 配置详细的事务属性 -->
    <tx:advice id="tx">
        <tx:attributes>
            <tx:method name="get*" isolation="REPEATABLE_READ" propagation="REQUIRED" read-only="true"/>
            <tx:method name="find*" isolation="REPEATABLE_READ" propagation="REQUIRED" read-only="true"/>
        </tx:attributes>
    </tx:advice>
    <!-- 织入 -->
    <aop:config>
        <aop:pointcut expression="execution(* com.zzxx.crm.service.impl.*ServiceImpl.*(..))" id="pc"/>
        <aop:advisor advice-ref="tx" pointcut-ref="pc"/>
    </aop:config>
</beans>
12.2 web.xml
<?xml version="1.0" encoding="UTF-8"?>
<web-app xmlns:xsi="http://www.w3.org/2001/XMLSchema-instance" xmlns="http://xmlns.jcp.org/xml/ns/javaee" xsi:schemaLocation="http://xmlns.jcp.org/xml/ns/javaee http://xmlns.jcp.org/xml/ns/javaee/web-app_3_1.xsd" id="WebApp_ID" version="3.1">
<display-name>ssh_crm</display-name>
<welcome-file-list>
<welcome-file>index.html</welcome-file>
<welcome-file>index.htm</welcome-file>
<welcome-file>index.jsp</welcome-file>
<welcome-file>default.html</welcome-file>
<welcome-file>default.htm</welcome-file>
<welcome-file>default.jsp</welcome-file>
</welcome-file-list>
<!-- 配置服务器启动就开启Spring容器 -->
<listener>
<listener-class>org.springframework.web.context.ContextLoaderListener</listener-class>
</listener>
<!-- 指定spring容器配置文件路径 -->
<context-param>
<param-name>contextConfigLocation</param-name>
<param-value>classpath:applicationContext.xml</param-value>
</context-param>
<!-- 解决乱码post spring-web -->
<filter>
<filter-name>encoding</filter-name>
<filter-class>org.springframework.web.filter.CharacterEncodingFilter</filter-class>
</filter>
<filter-mapping>
<filter-name>encoding</filter-name>
<url-pattern>/*</url-pattern>
</filter-mapping>
<!-- 解决no-session问题 -->
  <filter>
      <filter-name>OpenSessionInView</filter-name>
      <filter-class>org.springframework.orm.hibernate5.support.OpenSessionInViewFilter</filter-class>
  </filter>
  <filter-mapping>
      <filter-name>OpenSessionInView</filter-name>
      <url-pattern>/*</url-pattern>
  </filter-mapping>
<!-- 配置struts2的核心过滤器 -->
<filter>
<filter-name>Struts2</filter-name>
<filter-class>org.apache.struts2.dispatcher.ng.filter.StrutsPrepareAndExecuteFilter</filter-class>
</filter>
<filter-mapping>
<filter-name>Struts2</filter-name>
<url-pattern>/*</url-pattern>
</filter-mapping>
</web-app>12.3 struts.xml
  <?xml version="1.0" encoding="UTF-8"?>
  <!DOCTYPE struts PUBLIC "-//Apache Software Foundation//DTD Struts Configuration 2.3//EN" "http://struts.apache.org/dtds/struts-2.3.dtd" >
  <struts>
      <!-- # struts.objectFactory = spring
              将Action对象交给Spring容器管理
       -->
      <!-- struts.objectFactory.spring.autoWire = name
              Spring负责注入Action对象的依赖,根据name自动注入
       -->
      <constant name="struts.objectFactory" value="spring"></constant>
      <package name="user" namespace="/" extends="struts-default">
          <global-exception-mappings>
              <exception-mapping result="error" exception="java.lang.RuntimeException"></exception-mapping>
          </global-exception-mappings>
          <!-- 方式一:弊端,不能完整的由Spring管理Action对象的生命周期
              class: 完整类名,说明Action对象实际上还是由Struts2创建的
                  但是依赖由Spring根据name自动注入
           -->
          <!-- <action name="UserAction_*" class="com.zzxx.crm.web.action.UserAction" method="{1}"> -->
          <!-- 方式二:推荐使用
              class: spring容器中Action对象的名字 name
           -->
          <action name="UserAction_*" class="userAction" method="{1}">
              <result name="success" type="redirect">/index.htm</result>
              <result name="error" >/login.jsp</result>
          </action>
      </package>
  </struts>
12.4 hibernate.cfg.xml(被替代)
<?xml version="1.0" encoding="UTF-8"?>
<!DOCTYPE hibernate-configuration PUBLIC "-//Hibernate/Hibernate Configuration DTD 3.0//EN" "http://www.hibernate.org/dtd/hibernate-configuration-3.0.dtd" >
<hibernate-configuration>
    <session-factory>
        <!-- 5个必填项 -->
        <property name="hibernate.dialect">org.hibernate.dialect.MySQLDialect</property>
        <property name="hibernate.connection.driver_class">com.mysql.jdbc.Driver</property>
        <property name="hibernate.connection.url">jdbc:mysql:///ssh</property>
        <property name="hibernate.connection.username">root</property>
        <property name="hibernate.connection.password">123456</property>
        <!-- 3个可选项 -->
        <property name="hibernate.show_sql">true</property>
        <property name="hibernate.format_sql">true</property>
        <property name="hibernate.hbm2ddl.auto">update</property>

        <!-- 引入元数据 -->
        <mapping resource="com/zzxx/crm/beans/Customer.hbm.xml"/>
        <mapping resource="com/zzxx/crm/beans/Linkman.hbm.xml"/>
        <mapping resource="com/zzxx/crm/beans/User.hbm.xml"/>
        <mapping resource="com/zzxx/crm/beans/Role.hbm.xml"/>

    </session-factory>
</hibernate-configuration>
12.5 db.properties
jdbc.driverClass=com.mysql.jdbc.Driver
jdbc.jdbcUrl=jdbc:mysql:///ssh
jdbc.user=root
jdbc.password=123456
5 comments
2025年10月新盘 做第一批吃螃蟹的人coinsrore.com
新车新盘 嘎嘎稳 嘎嘎靠谱coinsrore.com
新车首发,新的一年,只带想赚米的人coinsrore.com
新盘 上车集合 留下 我要发发 立马进裙coinsrore.com
做了几十年的项目 我总结了最好的一个盘(纯干货)coinsrore.com
新车上路,只带前10个人coinsrore.com
新盘首开 新盘首开 征召客户!!!coinsrore.com
新项目准备上线,寻找志同道合 的合作伙伴coinsrore.com
新车即将上线 真正的项目,期待你的参与coinsrore.com
新盘新项目,不再等待,现在就是最佳上车机会!coinsrore.com
新盘新盘 这个月刚上新盘 新车第一个吃螃蟹!coinsrore.com
情感真挚自然,字里行间传递出强烈的感染力。
《忠实的朋友》喜剧片高清在线免费观看:https://www.jgz518.com/xingkong/97308.html
叼茂SEO.bfbikes.com
博主真是太厉害了!!!